Showing posts with label Gift Ideas. Show all posts

Friday, January 1, 2016

Wooden Wine Shelf


Wine Shelf

Are you looking for a good place to keep your bottles of wine?  Not only does this wine shelf look really nice, but it keeps the bottles and the wine glasses all together in one location.  Sure, you can go buy something similar to this and just hang it on the wall and be done with it.  But what fun is that?! Not only is it cheaper to make your own, but you can also customize it to fit your need or preference.  Besides, there's a great value you can put on something you made with your own hands.  To top it off, this shelf isn't a hard build and doesn't require a lot of different tools.  So let's get started!


Tools Needed:
Materials Needed:
  • 1" x 6" x 8' White Pine board
  • 1" x 8" x 8' White Pine board
  • 1-1/4" Pocket-hole screws (Coarse-thread)
  • 2" Finish Nails
  • Wood Stain
  • Polyurethane

**Affiliate links are used on this page.  See my disclosure page for more info on affiliate programs.


This shelf was built using white pine, which is a soft wood and is very easy to work with.  It is easy to shape and sand.  It can also be stained to achieve the color of your choosing.  All the boards have square cuts with all pieces butted together and joined using pocket-hole screws.  This is a very simple method of joinery and leaves all screws hidden.  The only thing you need is the KREG Pocket-Hole Jig and it is not very expensive.  If you not familiar with this system, you can check out my previous post: "Discovering Pocket-Holes!".   

Using the table saw and miter saw, the first thing you will need to do is Cut all the pieces to correct length and width.  Since a 1" x 6" actually measures 5-1/2" wide, all the pieces of that board will only need to be cut to length on the Miter saw.  A 1" x 8" actually measures 7-1/4" wide and only three pieces of that board will need to be cut to width on the Table saw.  There are only eight total pieces (four off of each board) needed to make this wine shelf.  See the following list for correct measurements:

(1" x 6" x 8'  Board)
  1. 18" L x 5-1/2" W (Left Side)
  2. 18" L x 5-1/2" W (Right Side)
  3. 24" L x 5-1/2" W (Front)
  4. 24" L x 5-1/2" W (Bottom- Glass Holder)

(1" x 8" x 8' Board)
  1. 24" L x 7-1/4" W (Back-Bottom)
  2. 26" L x 6" W (Top)
  3. 24" L x 4" W (Bottom of Wine Bottle Shelf)
  4. 24" L x 3" W (Back-Top)

Wine Glass HolderNow that all of the pieces are cut to length and width, you will need to Cut the slots in the very bottom piece.  These slots will allow the wine glasses to slide in and hang upside down from the shelf.  You will need to mark 1/4" wide slots 6" apart from each other.  Since the inside of the shelf is 24" long, and this shelf will have 4 glasses hanging from it, you can mark the first slot at 3" from one end.  After that, mark your next slot 6" away.  Repeat the process for the next two and you should have 3" remaining to the other end, which would make the slots centered in the shelf.  Once all the slots are marked, measure a center point (lengthwise) along each slot.  This should be at 2-3/4".  At that point you will need to drill a 1-1/2" hole through the board.  After all the holes are drilled, use the Jig Saw to cut the slots you already have marked from the front edge of the board to the holes.  This allows a glass to slide through the slot and sit down just a bit in the hole.  The hole keeps the glass still and free from sliding around.

 If you prefer, this is a great time to dress up some of the edges with a Router.  I chose to use a chamfer bit, which cuts at a 45 degree along the edge, on the Top, Left and Right Sides, Front, and along one edge of the Back pieces.  After this step, be sure to give all the pieces a good sanding with a Palm Sander and some 220 grit sandpaper.
With everything cut, it's time to Assemble all the pieces.  As I said earlier, I prefer to use pocket-holes screws to assemble this shelf, but if you don't have the KREG Jig, you can still use 2" finish nails instead.  Regardless which method you choose, it is very Important to make sure and use some wood glue in every joint!  To get started, you will need to attach the Front piece to the Shelf Bottom piece.  The front should cap over the shelf bottom, using pocket-hole screws through the bottom of the shelf piece.  Next, attach the other edge of the shelf bottom to the Bottom-Back piece, again using pocket-hole screws through the bottom of the shelf piece.  Make sure to leave the Bottom-Back piece hanging 1" below the Shelf Bottom.  This allows an open slot for the bottom of the glasses to slide through.  Next you can attach the Bottom-Glass Holder piece to the Bottom-Back piece using pocket-hole screws through the backside of the Bottom-Back piece.  After this, attach the Left Side piece, making sure everything is straight and square.  Repeat this for the Right Side piece.  Once you've got this far, attach the Back-Top piece in between the Left and Right sides along the back side at the top.  Again, use pocket-hole screws from the backside of the Back-Top piece.  The only thing left now is to attach the Top piece.  You can do this by using pocket-hole screws through the inside of the side pieces or just use 2" finish nails through the top into the side pieces.  The Top should be hanging over the side pieces by 1/2" on each side.

Top of Wine ShelfAfter it's all assembled, it's time to Apply the Finish.  Again, this is where you can customize this shelf to your preference.  I chose to apply a Minwax English Chestnut stain.  This was done by applying it with a cotton rag and then wiping away the excess with another cotton rag.  After waiting approximately 8 hours or so, I applied a coat of Minwax Semi-Gloss Polyurethane, using a foam brush.  You'll need to wait 4-6 hours for this to dry.  Once dry, lightly sand the shelf with 220 grit sandpaper- very lightly!  Wipe away all dust using a cotton rag with a little paint thinner on it.  Follow this with a tack cloth to make sure ALL dust has been removed.  You can now apply a 2nd coat of polyurethane.  Be careful to not allow it to run.  To really make it nice and smooth, repeat the same steps for a 3rd coat of polyurethane, but make sure to use a 400 grit sandpaper on this step.

Wine Shelf

Done!  That wasn't that bad, was it?  Now just hang it on the wall and fill it up.  Hope this was helpful.  Please leave me a comment with your thoughts or maybe even share some ideas of your own!  
Good luck and God Bless!

Tuesday, December 29, 2015

Making a Cedar Chest

Cedar Chest

Of all woodworking projects, the popularity of the cedar chest has definitely stood the test of time.  It's a piece of furniture that is usually around for many years, often times passed down from generation to generation.  There are also many different styles, shapes and sizes of cedar chests. Some are made with a different material and then have a thin layer of cedar applied to the inside, while others are made of solid cedar boards.  Some are made with the boards joined together vertically, while others are horizontal.  There's so many options that I'm sure there is one to match your personal style and woodworking experience.  Hopefully, this post is easy to follow and makes it helpful for you to build a cedar chest yourself.


Tools Needed:

**Affiliate links are used on this page.  See my disclosure page for more info on affiliate programs.


Before we get started, let's go over a few details first:
First of all, I used rough-cut cedar boards that were approximately 1-1/4" thick and planed them down to 1" thick with a portable planer.  If you prefer, you can buy lumber that is already planed from your local lumber yard.  If you do, make sure to adjust your measurements to account for the different thickness.  
Also, the particular chest that I've built for this post is 18" tall x 26" long x 18" wide.  The method used here will consist of solid cedar boards.  Each board's width varies from 3" to 6".  The boards will be joined together edge to edge, so you'll need enough boards to account for the lengths of each panel of the chest, plus a little extra. 
Now, let's begin........

The first step for me (after I had all the boards planed) was to Lay out the boards for each panel of the chest.  There are six panels: 
  1. Front- measures 26" L x 16" T
  2. Back- measures 26" L x 16" T
  3. Left side- measures 16" L x 16" T
  4. Right side- measures 16" L x 16" T
  5. Bottom- measures 24" L x 16" W
  6. Top- measures 26-1/4" L x 18-1/4" W
 For example, the Front panel should consist of enough boards approximately 17" long (16" + a little extra) that, when put together edge to edge, will add up to approximately 27" (26" + a little extra).  The extra is there to allow us to trim the panels down to exact size on the table saw when ready.  

Now that all the boards are laid out and you enough for each panel, it's a good idea to Run them through the Jointer.  The jointer is a power tool that operates very much like a thickness planer, except that it cuts the edge of a board instead of the face.  The purpose is to ensure that, when the boards are joined together, there are no gaps in between them.

Biscuit Cutter


Biscuit CutterAfter all the edges have been ran through the jointer, you are ready to Cut slots in the edges of the board with the Biscuit Cutter.  This power tool cuts a slot in the edge of the board.  In turn, a wooden "biscuit" is inserted into the slots and this helps strengthen the joints.  This works in way similar to using wooden dowels.  Before cutting the slots, make a mark about 1-1/2" from the end of the boards, and also every 3-4 inches in between.  It is very important to make marks on every board at the exact same locations.  If you don't, the boards may not fit together.  After all the slots are cut, use some wood glue along the edges and in the slots.  Insert the biscuits in the slots and fit the boards together.


Once the boards are glued, biscuits inserted and fit together, Clamp them together!  I used 3 bar clamps on each panel- one placed at the top, bottom, and in the middle.  Let the clamps remain on the panels for at least 24 hours.  This way the glue has enough time to dry.  Repeat the same process for all six panels.

Clamping Wood Panels

After waiting 24 hours, release the clamps and you are now ready to Trim the panels to the final size.  Using a Table Saw, you cut these panels to the final measurements mentioned above.  Now you should have six panels.  Before you start the assembly process, this would be a good time to sand all pieces with a Palm Sander.

Pocket-Hole System

Now that all panels are trimmed to size and sanded, it's Time to Assemble the pieces.  Let's start by making the bottom.  Turn the bottom panel upside down and attach three 1" x 3" boards across the panel using screws, making sure that the screws do not go all the way through the floor.  This will add strength to the bottom of the chest.  Now you can start attaching the four side panels to the bottom panel using finish nails or screws.  The left and right side panels will fit inside of the front and back panels and will attach with finish nails or Pocket-Hole Screws.  I would suggest that you start by attaching the front to the bottom.  Then attach the left side to the bottom, and then to the front along the corner.  Repeat the process for the other side.  And finally, attach the back to the bottom, and then to both side panels along the corners.  After all sides are in place, attach a 1" x 3" board around the top on the inside of the chest.  This will help tie everything together.  Congratulations, you've now built a box!

Inside of Cedar Chest
The next step is to Trim & Attach the Lid.  Just like you did on the bottom panel, turn the top panel upside down and attach three 1" x 3"  boards across the panel using screws, again making sure that the screws do not go all the way through lid.  After turning the panel back over, trim around the lid with cedar boards, making sure that they are 1/4" wider than the full thickness of the top panel.  For example, if you material is all 1" thick, then your full thickness would be 2".  Therefore, your trim pieces would need to be 2-1/4" wide.  Using a Miter Saw, cut the ends of the trim boards at a 45 degree angle.  Attach them all around the lid, using finish nails, keeping the top edge of the trim flush with the top of the lid.  Now you are ready to attach it.
  There are several different kind of hinges to use on the lid, but I prefer a piano hinge, which is a continuous hinge along the entire length of the lid.  If you can't find the correct length of hinge, you can always buy one that is long and cut it to correct length with a hacksaw.  With the lid laying in place on the chest, attach the hinge to both the lid and the back of the chest with the provided screws.


Cedar Chest- Unfinished
Cedar Chest Handles
After the lid is installed and working, it's time to Install Base Trim & Handles.  Using the same size of cedar boards as you used as trim around the lid, trim around the bottom of the chest in the same way.  This gives a nice finished look to the project.  The last item to install is the handles.  You can purchase handles from a hardware store, or do as I did, and make handles out of cedar boards you have left over.  I used 2" wide boards, that were 5" long, and attached them to the sides using screws from the inside of the chest and they worked great!  If you want, you can also Router the edges of the Lid and the Base trim to dress it up a little more.
Cedar Chest- Unfinished
Now that the cedar chest has been constructed and is working correctly, the final step is to Apply the Finish.  I chose not to use a stain on the chest because I wanted to keep the original color of the cedar.  I did, however, apply three coats of polyurethane.  Polyurethane provides a very durable protective surface to the wood, while also giving it a good shine.  These clear coats come in different finishes, such as satin, semi-gloss, or gloss.  Also, if you apply it with a foam brush, it's easier to control visible brush marks after it's dry.
Cedar Chest- Finished


Cedar Chest.....DONE!

Now obviously this project requires a little time to complete, but it's worth it.  Remember that you don't have to make it too complicated.  There are many different methods of construction out there, but not all are too complicated.  It is definitely possible to build this project, even if you don't have an amazing array of tools, or experienced woodworking abilities.  Hopefully this tutorial will give you the confidence you need, and the know-how to make that cedar chest you've always wanted.

As always, please feel free to leave me a comment and let me know what you think.  Good Luck!

Thursday, July 2, 2015

Building a Round Reception Desk


Round Reception Desk


Recently, my wife was wanting to do some updating to the inside of her hair salon.  This involved painting the walls, removing an old L-shaped reception desk (that she has always hated) and building her a new one.  She didn't want just any ordinary desk to replace the old one, she wanted one that was round (or oval) on the front.  It took a little head scratching at first but I was up for the challenge.  The desk would be approximately 8 ft. long (or around the oval front), with an 18" wide top at 44 in. high.  It would also have a desk top on the back side for her computer and printer at 28-1/2" high.  Finally, since she is always apt to moving furniture around, it would need to be on wheels.  Although this project was a little challenging at first, it wasn't too difficult.  Best of all, it only cost about $200 for the materials!

If this is a desk you would like to build yourself, hopefully I've done the head scratching for you.  Let's get started with what you are going to need.

Materials Needed:

  • (1)- 3/4" plywood (CD grade)
  • (1)- 3/4" plywood (nicer grade, this will be the top of the desk)
  • (3)- 1/4" plywood (nicer grade, this will be the front of the desk)
  • (10)- 2"x 4"x 8'
  • (2#)- 3" screws
  • (1#)- 1-5/8" screws
  • 1" Brad Nails
  • Paint or Stain (your preference)

**Affiliate links are used on this page.  See my disclosure page for more info on affiliate programs.


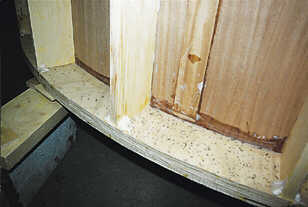
The very first part of the process is to come up with the correct radius for the front.  I built this particular desk to be roughly 8 ft. around the front.  This way, there would be no seams in the plywood anywhere.  You will need to frame a wall that is 39-3/4" tall.  In order to make the wall round, you will need to use the 3/4" plywood for your top and bottom framing members.  By using a string or a scrap board, draw a 60" radius (kind of like a giant protractor).  Once you draw it, make sure it is 8' from one end to the other.  Now you will need to draw one more line that is 3-1/2" from the other.  This will make it the same thickness as the 2"x 4"s you will be attaching to them.  Now you have drawn what will be a curved bottom plate for your wall.  After drawing this out on the plywood, cut it out using a Jig Saw.  Now, trace it out and cut out another one (duplicate) to be the top plate.  Once the plates are cut, you will need to mark where the studs will go (just like an ordinary wall).  For this project, I prefer to space them 12" apart.  Next, cut the 2"x 4"s to 39" long using a Miter Saw or Circular Saw.  Attach these boards (studs) in between the plywood top and bottom plates using 3" screws.  You now have a curved wall formed and the main part of the desk is together!
Curved Wall Framing


On the ends of the wall, you will need to frame a small wall section that will come back in at a 90 degree angle.  Allowing for the thickness of the curved wall with the plywood that will be on the front, this wall will need to be 11" long.  Build these two walls just as before, only you can use the 2"x 4"s for all parts (top, bottom and studs).  Once they're assembled, attach one to each side of the curved wall using 3" screws.

The next step will be covering the front and sides with plywood.  Because it's extremely hard to get 3/4", or even 1/2" plywood to bend, you will need to use 1/4" plywood to wrap around the curved front.  Start be cutting the plywood to 40" wide using a Table Saw or Circular Saw.  This will allow for the plywood to hang over the bottom of the framework by 1/4".  Using a Brad Nailer, attach the plywood to the front of the curved desk with 1" brads.  It's a good idea to use some wood glue for some extra holding power.  Once this is done, apply a second layer of 1/4" plywood using the same method.  Using the remaining 1/4" plywood, cut out pieces and attach to the sidewalls, as well as the end of the sidewalls too.

For the top of the desk, you will need to use a nice piece of 3/4" plywood.  I used birch and then painted it.  Choose your material depending on whether you wish to paint or stain the desk.  To get the right curve for your top, you can lay the whole piece of plywood on top of the desk with one edge hanging over by about 2".  Once you have it placed accordingly, trace out the front edge.  Now, moving the sheet of plywood forward 18", trace it again.
Round Reception Desk Shape
Your Top will look like this!
This will give you an outline for a top that will match the desk, while giving you a 3/4" overhang all the way around.  Cut this out using a Jig Saw.  Using a Router, you can put a decorative edge around the top for a nice touch.  Once the top is cut and the edges are routered, anchor it to the desk by using 1-5/8" screws from the underside of the top plate.  This method will keep you from having any screws showing in the desk top.  Now, using the remainder of this piece of plywood, cut out a piece to fit inside the desk.  This piece will go along the inside of the curved desk and will also make a straight line from one end of the desk to the other (see pictures for clarity).
Round Reception Desk
View  from Behind the Desk

Using metal shelf brackets underneath both the top and lower desk tops will help ensure they are good and sturdy.

Final touches on the desk can be totally up to your preference and style.  As you can see, I used outside corner trim on the corners.  Also, my wife really wanted to install trim on the front of the desk in three sections.  It's cut and installed like picture frames.  As always, she has a great eye for these things and this was no different.  I think it really made it look great!  She decided to paint this desk a creamy white.  We also applied a water-based clear coat to the top to ensure it would be durable and long-lasting.  The final step to this project was installing four 2" swivel casters with locks.  Like I said earlier, my wife is always moving things around.  This should definitely help her out whenever she feels the need to change things up!

Round Reception Desk
Side View


Thanks to my wife for the opportunity to do this project!  As always, I look forward to any comments you may have regarding this post.
Round Reception Desk
Finished!

Saturday, March 14, 2015

Installing a Shower Door


New Shower DoorDoes your shower have a curtain hanging and you'd rather have a door?  Or maybe you've got a shower door already but would like a new one.  Once again, I'm gonna show you how you can make it happen, and as always, save some money by doing it yourself!

What you'll need:

**Affiliate links are used on this page.  See my disclosure page for more info on affiliate programs.

The first thing your going to need to do is remove the existing door or curtain.  If you've currently got a shower curtain, then it should be relatively easy to remove.  Just release the tension on the rod or you'll possibly have to remove a few screws on the brackets at the ends of the rod.  Either way, it's a really quick process.  If you currently have a shower door, this will take a little longer.  The process goes like this:  The doors have casters attached to the top of them and are hanging from the top rail of the frame.  There is also a door guide attached to the middle of the bottom track.  Move both doors to one side and remove the screws in the door guide and take the guide out.  The doors will freely swing in and out at this point.  Swing the bottom of the inside door in toward the shower and lift up to unhook the casters from the top rail.  Discard the door.  Repeat this same process for the other door.  If there is any silicone or caulking around the frame, you will need to remove this.  With the doors removed. the top rail should just lift up off of the wall jambs (this is the shower frame on the side walls).  After the top rail is off, remove the screws holding the wall jambs in place.  The only part remaining now should be the bottom track.  Typically, this is just held in place by a bead of silicone underneath it.  Using a knife or screwdriver, slowly cut this away while pulling the track up at the same time.  After the track is removed, do a thorough cleaning on the entire area before you start installing the new door.

Level Wall PiecesBottom TrackNow that we've went over the process of removing the old shower door system, you should understand the install better.  It's pretty much the same process in the opposite order.  The first part you will need is the bottom track.  Measure the length between the side walls and subtract 1/4".  This will be the length that the bottom track will be cut to.  Transfer this measurement to the new track and cut it to length using the hacksaw.  Position the track on the center of the ledge.  If you are installing this on a fiberglass shower unit, you may need to file the ends to match the rounded corners.  If it's going on a tiled shower wall, the track will usually fit just fine with square ends.  Once you've got it in place, tape it down and mark the position.  You can now position the new wall jambs (side pieces) onto the bottom track.  Holding it against the wall and using a level, make sure the jamb is plumb (vertically level) and mark the screw holes.  The next step is to remove the side pieces and drill the holes in the side walls using a drill bit and Drill.  The hole size will vary with different manufacturers (typically 5/16") and if you are drilling into ceramic tile, you will need to use a masonry drill bit.  After all the holes are drilled, install the plastic anchors that should be included with the new shower door (these simply press into the holes that you drilled).  Now that the side pieces have been removed, remove the bottom track as well.  Apply a bead of silicone underneath the track along the groove on the outside edge of the bottom of the track.  Position it back where you had it marked before and apply tape to hold it down again.  The next step will be to place the side pieces back into their position and install them using the screws provided into the anchors in the wall.  On each side, there will be a door bumper installed with the screw in the top and bottom spots.  After this, the bottom track and the wall jambs are installed!  The HARD part is now done!!!

Wall JambMasonry Drill Bit

  Next you will need to measure the top, from one wall to the other.  This will be the length you'll need to cut the new top rail.  Just as you cut the bottom track, use the hacksaw to cut the top rail to length.  The top rail will just fit over the side pieces securely.  The weight of the glass doors will definitely hold it in place.  Now onto the doors.

Shower Door Frame  Using a screwdriver, attach the hanging brackets on the top edge of each door.  After this, attach the casters (wheels that the door rolls along the top rail with) to the hanging brackets using a screwdriver as well.  You're now ready to hang the doors from the top rail!  While holding one door upright, swing the bottom in toward the shower and raise the top (end with the casters attached) up into the top rail and hang the casters on the inside edge inside the rail.  Repeat the same process for the other door, except this time you will hang the door on the outside edge inside the top rail.  Now that the doors are hanging and able to slide either way, you need to slide the doors up against both wall jambs to make sure they close all the way up against the door bumpers that are on the wall jambs.  If they don't, you will need to adjust to fit.  The hanging brackets that you installed on the top edge of the doors usually have three separate holes.  This is to allow for adjustment.  If the door is not closing all the way at the top, you can adjust the casters either up or down on the hanging brackets to make it fit nicely.  Use the same process to make it fit better at the bottom, if needed.  After both doors are adjusted, the door guide will need to be installed on the bottom track.  This door guide will keep the sliding doors moving smoothly and not rubbing against each other.  Locate the middle of the bottom track and place the door guide in place at this location.  Using the self-tapping screws provided, attach the door guide to the bottom track.  Once this is done, the door handles can be installed.  Install one facing the inside of the shower, while the other should face the outside.  You're almost done!  Now that everything is installed and working, the only thing left is to seal it all up.  Apply a bead of silicone on the outside of the shower along the entire length of the wall jambs and the bottom track (silicone should be placed where the shower frame meets the wall and shower base).  On the inside of the shower, only apply the silicone to the wall jambs, NOT the bottom track!  This allows any water that happens to make its way behind the frame to drain back into the shower, not out onto the bathroom floor.  At this point, the shower door has been installed.  You should not use the shower or expose the silicone to any water at all until the next day.  This will ensure that all silicone has dried sufficiently and your new shower door system will not leak.


New Shower DoorWhile these instructions might make this project sound pretty easy, it does require patience!  I would consider this to have a medium range of difficulty and the time to complete this should be about 4-5 hours.  I hope this post gives you enough information and tips to help build your confidence in tackling a project like this.  As always, I am interested in your feedback.  Please let me know what you think of this post.  If you have any questions, please feel free to leave me a comment and I'll be happy to respond.  Good luck!

Cory


Saturday, February 28, 2015

Discovering Pocket-Holes!

Pocket-Hole System


  If you've done any woodworking at all, you've probably dealt with the decision of whether to use nails or screws.  Of course, there are pros and cons to both methods (as with everything!).  For starters, screws are less apt to back up, while we all know that nails can do this over time.  On the flip side, a screw head is a lot harder to hide, or fill, than a nail head.  I can go on and on over different reasons why you should use screws or nails, but the truth is that there is a reason for both.  Both are great methods of joinery that have been used for years and for very good reason.  In a nutshell, there is a time and application to use screws, and also the same for nails.

  Several years ago I was building kitchen cabinets and I came across, what was new to me, a different method of joinery.  It was called the KREG™ Pocket-Hole System.  This method would give me the holding power that I liked from screws, while at the same time, not having to worry about hiding or filling the screw heads because........they were Hidden!  This was especially beneficial to me on the cabinet project because I could now join all of the face frame parts (stiles & rails) from behind.  Sounds crazy, huh?  It's actually a brilliant idea.  You see, before, I would have to toe-nail a finish nail through the rails, into the stiles.  This could be tricky because, even with the boards clamped together, they could still shift slightly when the nail was driven.  It's just a tedious process, and if you are seeking perfection, it is extremely important!
Pocket-Hole System


  This new system works by using a perfectly designed pre-drilling jig that aligns the drill holes at a sharp angle through the work piece from the back side.  After laying out where you want to drill the holes, a step-drill bit (which makes a pilot hole for your screw at the same time) is used.
 Once all holes are drilled, assemble the pieces with wood glue applied in the joints, and clamp together.  Now using the 6" extension driver bit included with the kit, run the "pocket-hole screws" in, making sure not to overtighten them.  After all screws are applied, remove the clamps and what you have now is perfect wood joints that won't back up!  And best of all, you can't see any screws or nails....perfect!

Now since then, I've learned of more applications for this pocket-hole system, such as:  building the actual cabinet boxes (not just the face-frames) and other furniture pieces too.  You can also adjust the pre-drilling jig and use longer pocket-hole screws.  This will let you use this method on 2x material also.  Kreg also makes a shelf pin jig so you can make multiple matching holes for shelf pins.  Really makes this easy!  All of the jigs come in different sizes and multiple price ranges.


**Affiliate links are used on this page.  See my disclosure page for more info on affiliate programs.


The pocket-hole system has been a difference maker for me.  Since I discovered this method, there have been more woodworking projects that I'm confident in doing.  As I said earlier, this system comes in many different sizes.  I started out with the smallest, basic kit and it has worked perfect for almost everything I've done.  They now offer a DIY kit that is like a basic "all-in-one" option that could be a great buy.

I am not being paid by Kreg, and its not necessarily my intention to promote this company, however, I am promoting their product.  I do believe it is a wonderful joinery method that can be beneficial to both the professional and average DIYer at the same time!  I've included a YouTube video about the Kreg DIY kit.  I recommend that you watch the video and hopefully are intrigued to try this method yourself.  Good luck down the road "Doing-It-Yourself"!  As always, please leave me a comment on your thoughts and don't hesitate to add your input!
Cory

Monday, February 16, 2015

Top 10 DIY Power Tools

Whether your a regular handyman or weekend DIYer, not only do you need to know how to perform the job, you need to have the tools to perform the job with.  Some projects require different tools than others and it's very important to have the right tool for the job, so it's safe to say that having a variety of tools on hand is a good idea.  In case you are unsure of which tools to keep around, I've put together a good starter list of tools that will help you be equipped to handle most jobs.  All of these tools can be purchased at your local home improvement stores.  (Pictures are just examples and not necessarily a recommendation of brands).

**Affiliate links are used on this page.  See my disclosure page for more info on affiliate programs.


Cordless Drill

Cordless Drill
I start this list with the Cordless Drill because it has always been the most used tool that I have.  I use it on almost every job I do.  Every year it seems that there is a better model with more power available.  Now with the arrival of the Lithium-Ion battery, these drills are more powerful and, at the same time, lighter than ever!

Avg. Pricing: $100 - $250


Circular Saw

Circular Saw
If you were to poll every handyman out there, you would easily find out that the most common power tool ever used is the Circular Saw.  This was the very first power tool I ever purchased and has hands-down been the most valuable.  If you do much wood cutting at all, you'll definitely get your money's worth.  Now there are also different sizes and options available too.  The most standard circular saw used is the 7-1/4" corded model, but you can also get a cordless, battery-powered model also.  This saw is a little bit smaller but the convenience of being cordless makes it worth it.

Avg. Pricing: $60 -$150


                                                                        Nail Gun

Nail Guns
Now this is the tool that my stubbornness kept me from using the longest.  Years ago, I refused to invest in a nail gun because I felt like it wasn't needed.  I believed that a true carpenter would be able to do everything with the traditional hammer and nails and using a Nail Gun would be "cheating".  Oh how I was wrong!!  It took some shedding my pride and learning to be open-minded to new ideas, but I soon learned that this tool actually made my work better and quicker.  With the nail gun, you no longer need to worry about pre-drilling holes (especially in hardwoods like oak) and they also instantly drive the nails where you want them.  Most nail guns are pneumatic and require the use of an air compressor to power them.  Paslode is a brand that still makes a model that uses CO2 cartridges to power them, so there is no need for the compressor.  There is now even a battery-powered model on the market for an even more convenient option.  Either option you take, the nail gun is an extremely beneficial tool.  Be sure to read my post about Nail Gun Safety !

Avg. Pricing: $75 - $200


Compound Miter Saw


Compound Miter Saw
The Compound Miter Saw is very handy when making a lot of angle cuts or multiple cuts of the same length.  If you have very much trim to install, this tool will help you make accurate angle cuts, especially if you installing crown molding.  This saw, not only cuts 0-45 degrees on either side, but the head also  pivots up to 45 degrees to one side, making it possible to make a compound miter cut.  That may be something that's hard for you to imagine needed to do, but if you ever need to, it's hard to replace the ease and accuracy this saw gives you.  The compound miter saw is a great tool, and because of this, I'm sure you'll find yourself using it more than you ever thought.

Avg. Pricing: $100 - $300


Table Saw


Table Saw
Now this tool may be for the more advanced DIYer but the Table Saw is definitely a super tool.  It takes some time getting comfortable using it, but when you do, your DIY ability will greatly increase.  The Table Saw gives so many more wood cutting options than any other tool.  With an adjustable fence, you can rip boards down to whatever width you need.  Also, the blade bevels from 0-45 degrees to give even more cutting options.  This tool will take up a little space in your shop or garage, but with the mobile base option, you can easily move it around as needed.  I definitely recommend this tool, especially if you enjoy woodworking.

Avg. Pricing: $175- up


Router

Router
Now I personally don't use the Router as much as I do other tools, but when I need one...I need one.  Routers can be used for creating edges to wood for joinery or decoration and also to make mortises (or recessing in doors) for hinges.  They can also be used on countertops.  If you are installing a laminate countertop, and using it in sheet form, you will need to trim off the edges to fit the counter.  By using a router with the correct bit, this can be done easily and accurately.  The truth is there are many, many different router bits available to perform many different functions.  Like I said earlier, you may not need a router often, but when you need one...you need one.

Avg. Pricing: $70 - $200


Jigsaw


Jig Saw
Jigsaws are perfect tool to make curved cuts in wood.  These tools come in different styles, with some being handle grip and others being barrel grip.  Another capability of the jigsaw is it's orbital motion.  By turning the setting up, the blade not only goes up and down, it moves forward and backward also, making it make cut faster (this should only be done on straight cuts, though).  You can even rotate the base of the saw 0-45 degrees to produce an angle cut.  The jigsaw is a tool that is pretty affordable and anyone should be able to use.

Avg. Pricing: $40 - $150


Reciprocating Saw


Reciprocating Saw
The Reciprocating Saw is a tool that has many uses, mostly in a remodeling atmosphere.  If you are in the need of tearing things apart or removing wood, it's hard to replace this tool.  In an earlier post, I wrote about replacing a front door, in which I used a reciprocating saw to remove the old door jamb from the wall.  It can be used to cut wood or metal, depending on which blade you use.  This tool can be purchased in the corded or battery-powered model,  You can also purchase a kit that includes a portable drill, circular saw, reciprocating saw, flashlight, charger and batteries.  You'll spend a little more money, but what you get in return is a universal bag of tools.

Avg. Pricing: $80 - $250


Palm Sander


Pam Sander
If you do any kind of woodworking at all, you'll definitely need a sander.  The one I use is an orbital Palm Sander.  With this kind, I have to purchase "hook-n-loop" style sanding pads.  You can also purchase a 1/4 sheet sander and buy your sandpaper in sheet form and cut them into 1/4 sheets, and then just clamp them on the sander.  There will always be certain times when hand sanding is the only option, but for most situations, an electric sander saves you time and effort and is worth the money!

Avg. Pricing: $50 - $100


Tile Saw


Tile Saw
Have you ever considered installing ceramic tile on your floors or countertops?  If so, you will need a Tile Saw.  This saw uses a diamond blade that is constantly applied with water to keep it cool while it cuts the tile.  These tools come in an array of sizes and prices.  There is one available for every type of user, from the average DIYer to the commercial contractor.

Avg. Pricing: $90 - up


BONUS****

Airless Paint Sprayer


Airless Paint Sprayer
As a bonus, I decided to add one more tool to this list.  You might think that the Airless Paint Sprayer is for painting contractors only, but I beg to differ!  These can be used for painting the inside or outside of a house.  You can paint fences and many other items.  Also, they can be used to apply wood stain to large areas like fences or siding.  I don't use my sprayer all the time, but when I do, I'm glad I have it.

Avg. Pricing: $100 - up


Now this is by no means a list of required tools to for any DIY project, but more like a compilation of the most useful tools to have in your arsenal.....in my opinion.  While I have all of these tools, I did not purchase them all at once.  Over time, I slowly obtained them as I needed them.  The good thing is that the more tools I have, the more equipped I am to do projects myself!

Please feel free to leave me a comment if you have any questions or just want to add any input.  Your input is always welcome here!

Cory

10 Safety Tips for Using a Ladder